双目常电 RTSP IPC 应用
本文将以 V821 PERF2 板为示例,搭配不同摄像头,演示搭建双目 Smart IPC 场景功能,包括:
| 项目 | 双目 1M 插值 2M 场景 | 双目 2M 场景 | 双目 2M 合并一路场景(上下拼接) |
|---|---|---|---|
| 摄像头 | GC1084 + GC1084 | GC2083 + GC2083 | GC2083 + GC2083 |
| 编码方式 | 在线编码 | 在线编码 | 在线编码 |
| 主码流 | H.264,1280x720@15fps | H.264,1920x1080@15fps | H.264,1920x2160@15fps |
| 子码流 | H.264,640x480@15fps | H.264,640x480@15fps | H.264,640x480@15fps |
| SD卡 | 录像 + 写卡 + 读卡 | 录像 + 写卡 + 读卡 | 录像 + 写卡 + 读卡 |
| WiFi RTSP 主码流图传 | √ | √ | √ |
| 抓拍(JPEG编码) | √ | √ | √ |
| 人形检测 + 主码流图传画框 | √ | √ | √ |
| 音频 | 录制+播放 | 录制+播放 | 录制+播放 |
硬件准备
双目 1M 硬件
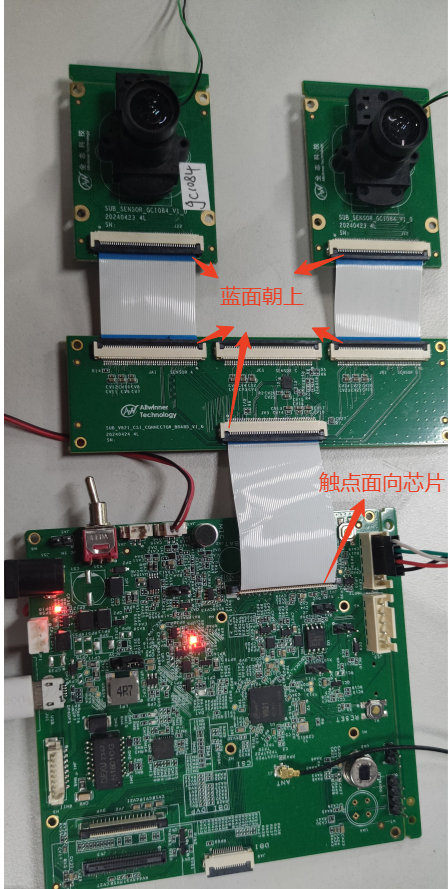
V821 Perf2 板 + 双目 GC1084 实物图如下:
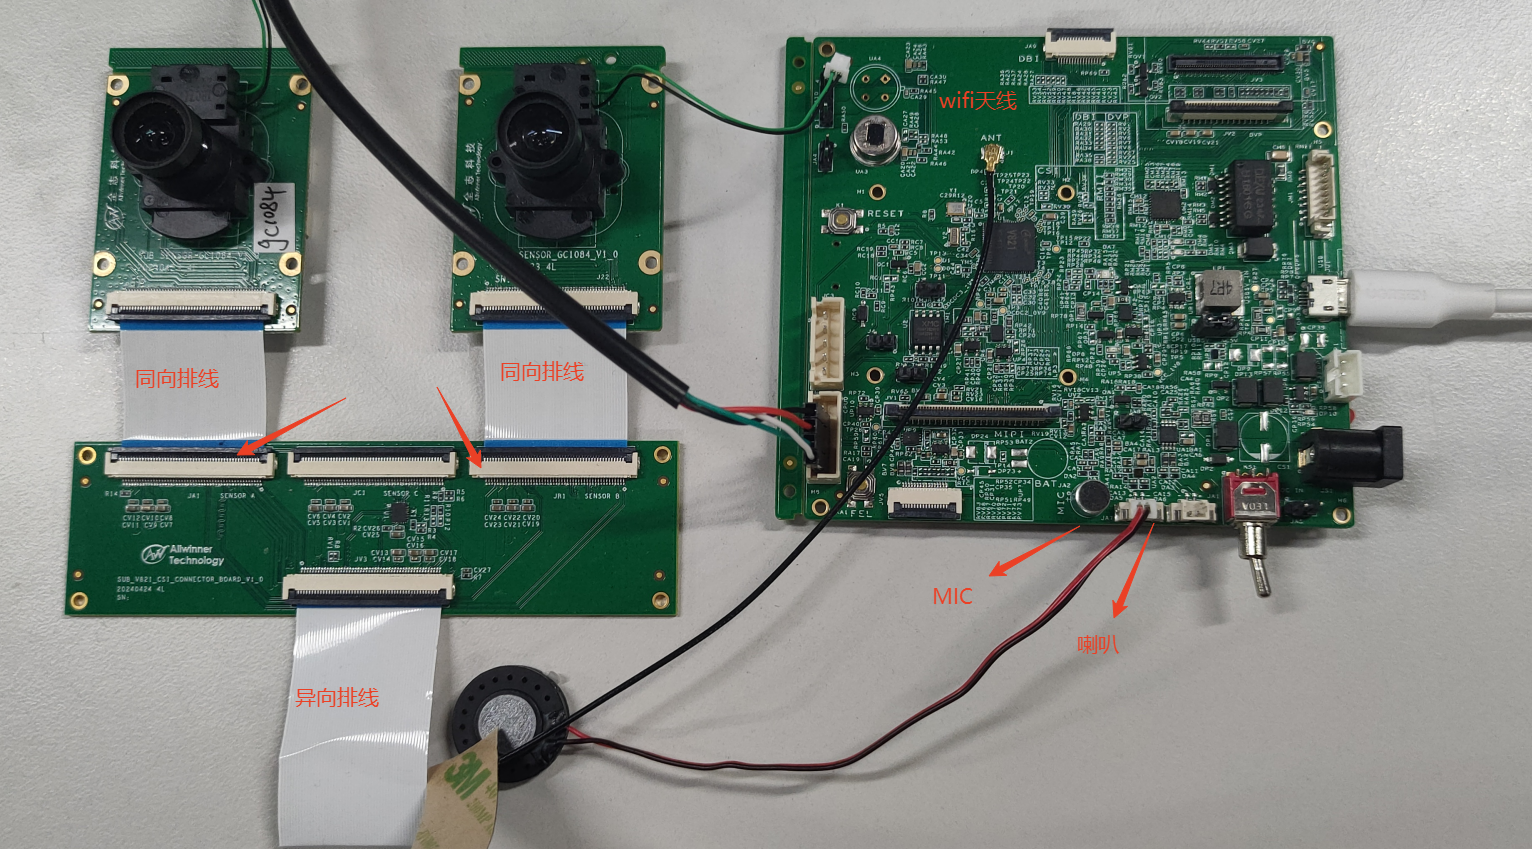
连接示意图如下:
双目 2M 硬件
V821 PERF2 板 + 双目 GC2083 板子连接示意图同上节双目 GC1084 连接一样,需要注意的是双目 GC2083 的sensor0(sensor A) 和sensor1(sensor B) 位置是固定的,不能对换。
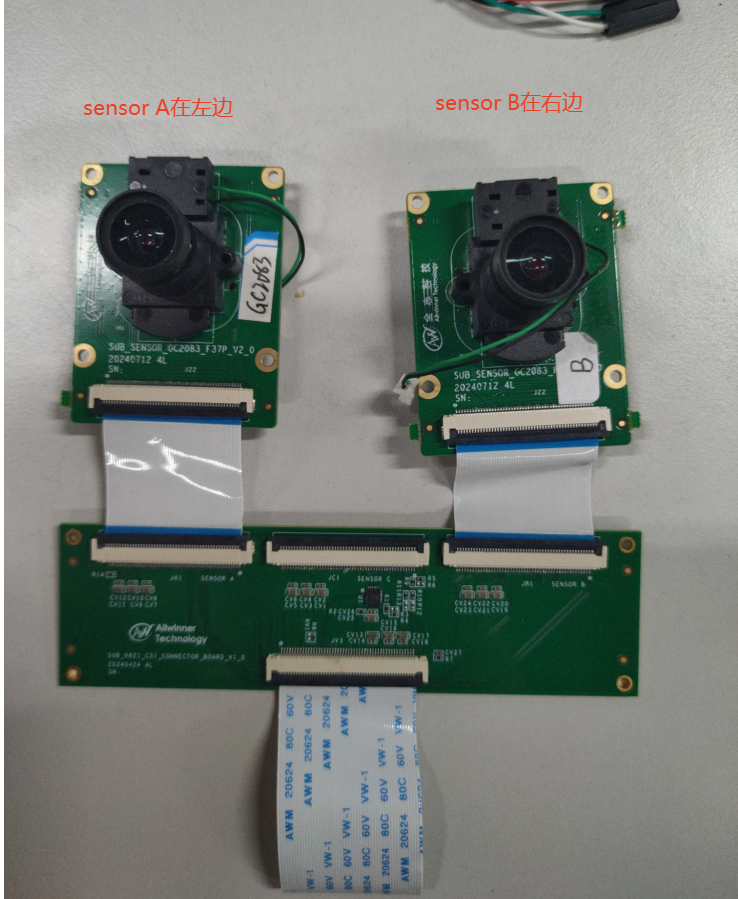
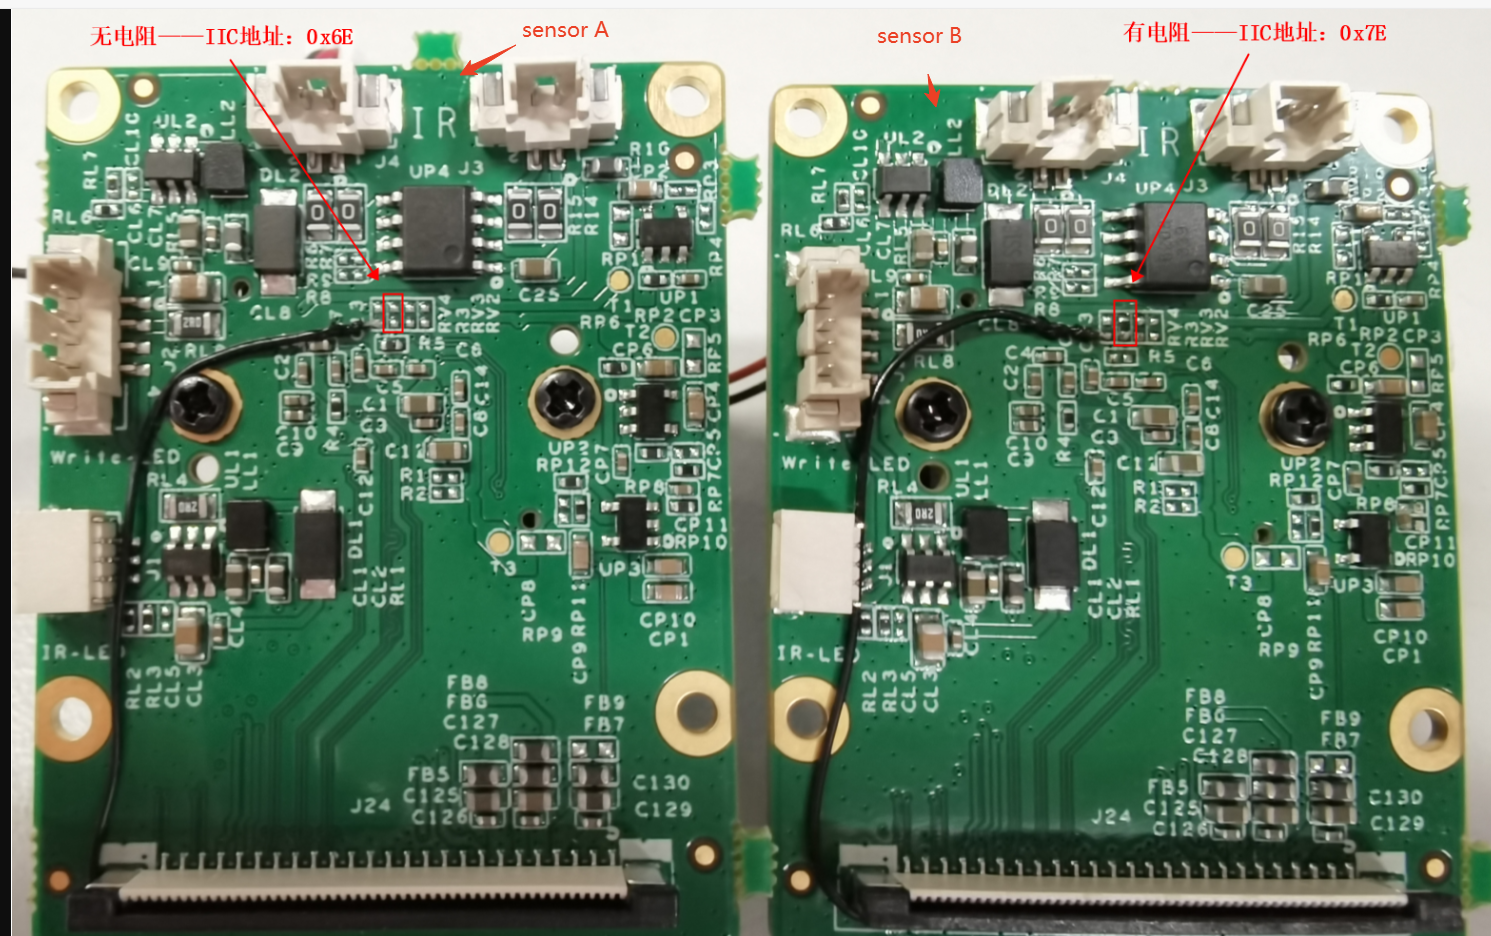
其中sensor0(sensor A) 和sensor1(sensor B)子板的差异如下:
应用勾选
常电 IPC 场景使用的应用是 sample smartIPC_demo,运行 m menuconfig 然后勾选如下选项
Allwinner  --->
	eyesee-mpp  --->
		[*]   select mpp sample
		[*]     mpp sample smartIPC_demo
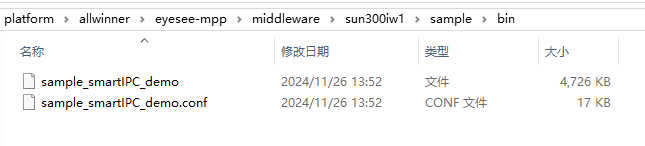
编译后的可执行文件会存放在 platform/allwinner/eyesee-mpp/middleware/sun300iw1/sample/bin 文件夹中
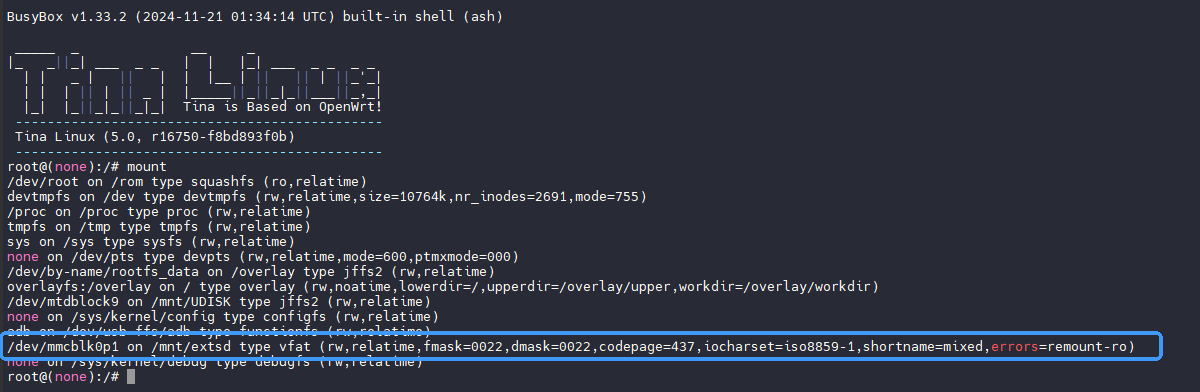
将 Sample 复制到 TF 卡中,同时准备一个测试音频 test.wav 也放进 TF卡中。接入 V821 开发板使用。V821 在每次启动时都会尝试挂载 TF 卡到 /mnt/extsd 目录下。目前 SDK 未配置自动挂载功能。如果是启动后插入 TF 卡,需要手动挂载。
mount /dev/mmcblk0p1 /mnt/extsd
系统启动后可以用 mount 命令查看挂载情况
系统配置
(1)开启硬件人形缩放
由于场景需要音频+人形的全功能场景,需要配置SDK硬件人形缩放功能。使用 quick_config 选择选项de_resize_config,启用硬件人形缩放功能,quick_config 序号请根据输出选择

双目 1M 插值 2M 场景
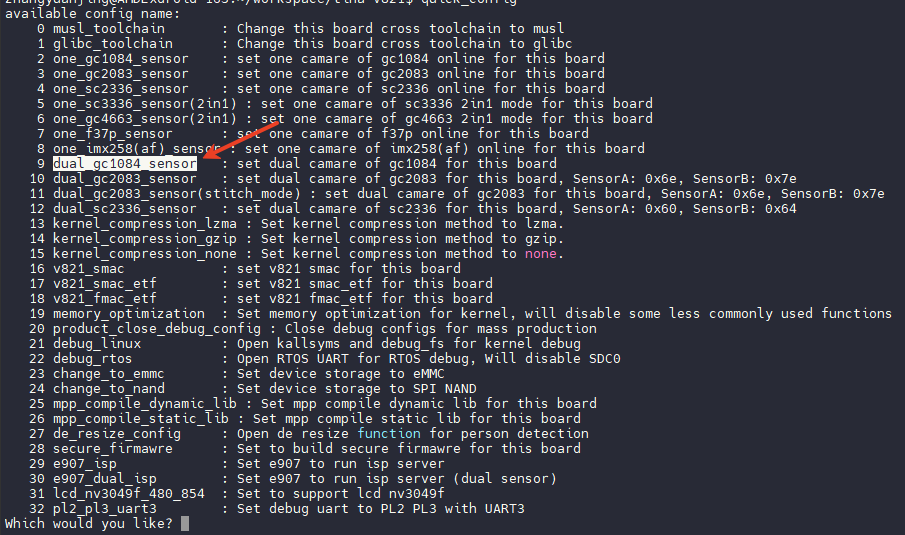
选择双目 GC1084 摄像头
运行 quick_config 选择双目 GC1084 摄像头配置,运行即可
修改配置参数
在默认的 sample_smartIPC_demo.conf 基础上,修改如下参数:
region_link_enable = 0
region_link_tex_detect_enable = 0
region_link_motion_detect_enable = 0

audio_test_enable = 1
motionAlarm_on = 1

main_rtsp_id = 0
main_isp_algo_freq = 5
main_src_width = 1280
main_src_height = 720
main_src_frame_rate = 15
main_encode_width = 1920
main_encode_height = 1080
main_encode_frame_rate = 15
main_online_en = 1
main_online_share_buf_num = 1
main_2nd_enable = 1
main_2nd_src_width = 640
main_2nd_src_height = 480
main_2nd_src_frame_rate = 15
main_2nd_encode_width = 640
main_2nd_encode_height = 480
main_2nd_encode_frame_rate = 15
main_2nd_take_picture = 1
main_2nd_pdet_enable = 1

sub_enable = 1
sub_rtsp_id = 1
sub_isp_algo_freq = 5
sub_src_width = 1280
sub_src_height = 720
sub_src_frame_rate = 15
sub_encode_width = 1920
sub_encode_height = 1080
sub_encode_frame_rate = 15
sub_online_en = 1
sub_online_share_buf_num = 1
sub_2nd_enable = 1
sub_2nd_src_width = 640
sub_2nd_src_height = 480
sub_2nd_src_frame_rate = 15
sub_2nd_encode_width = 640
sub_2nd_encode_height = 480
sub_2nd_encode_frame_rate = 15
sub_2nd_take_picture = 1
连接网络
使用命令扫描 WIFI 网络
wifi -s
找到需要连接的 WIFI 网络后,使用命令连接
wifi -c <SSID> <PASSWORD>
连接成功后会显示 wlan0: link becomes ready

运行 Sample
执行命令
/mnt/extsd/sample_smartIPC_demo -path /mnt/extsd/sample_smartIPC_demo.conf
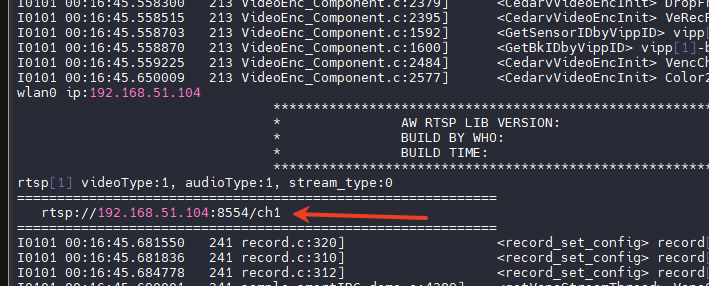
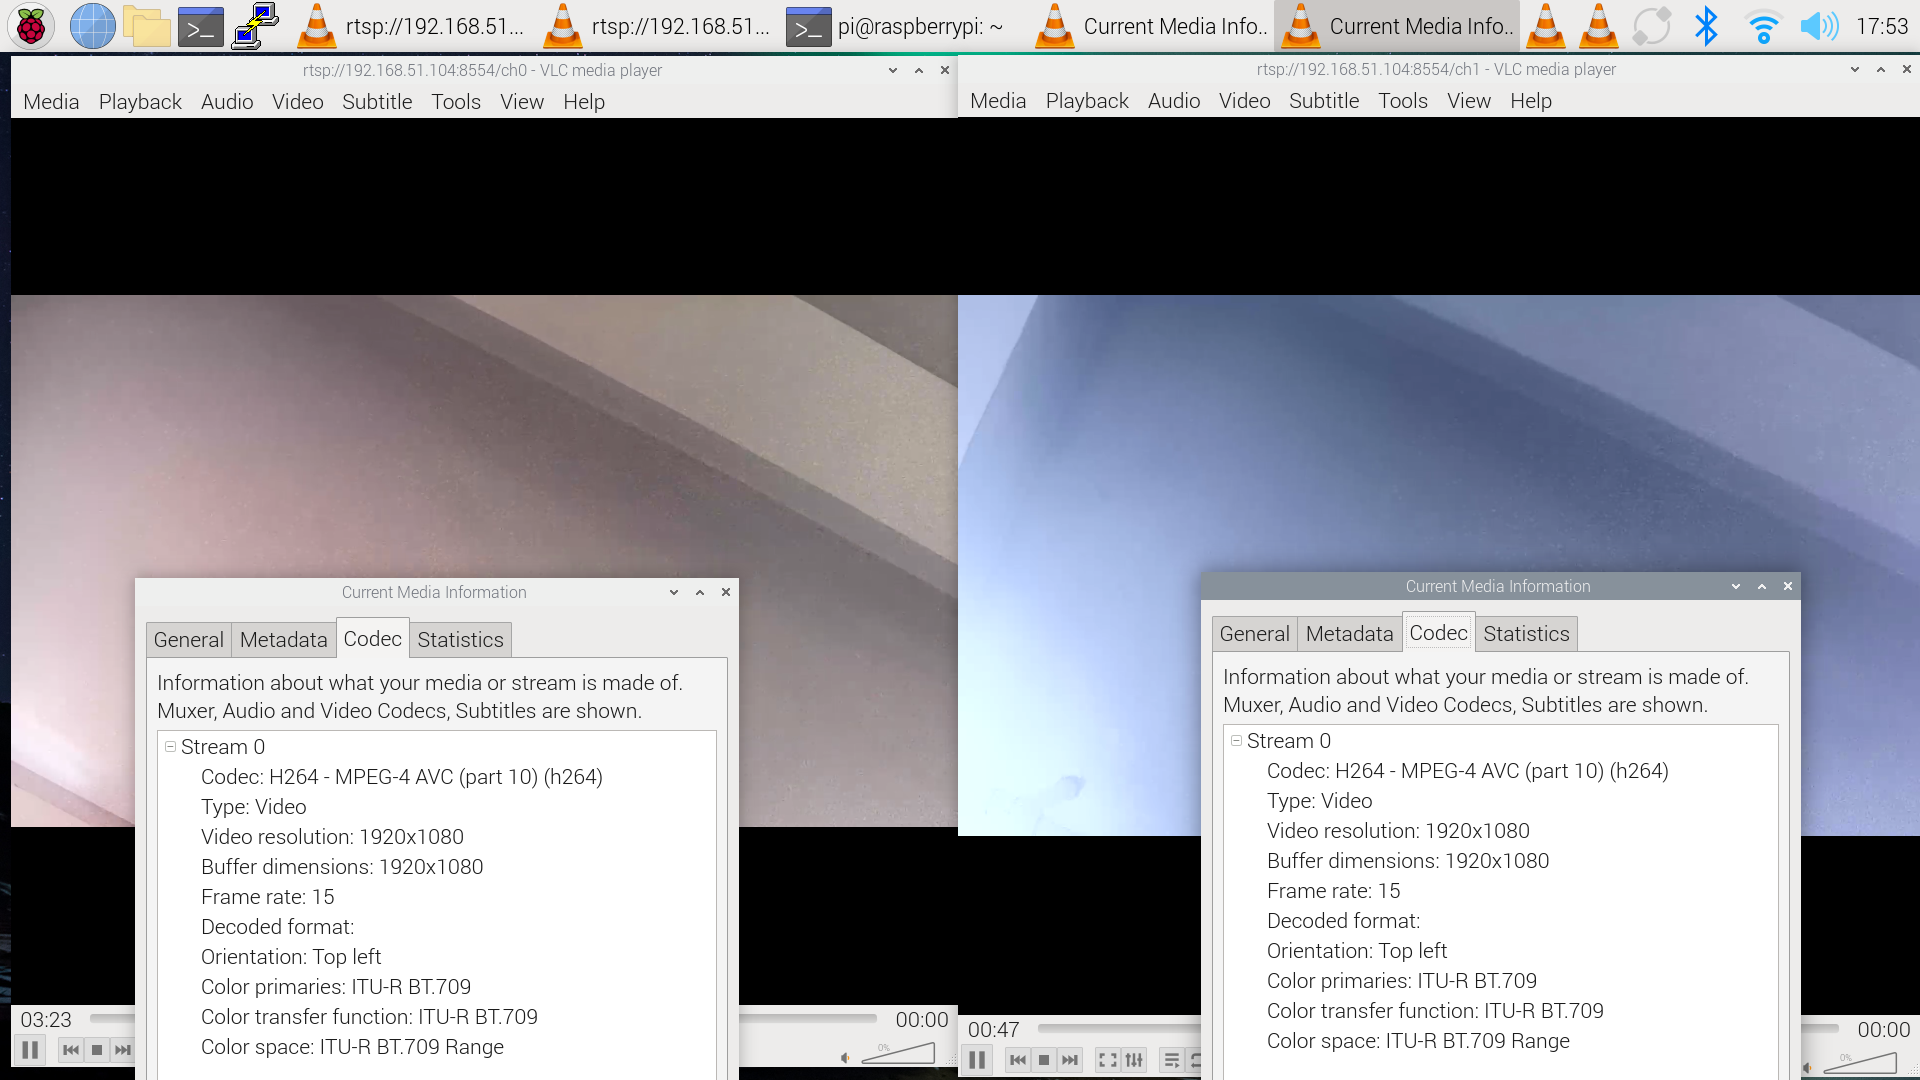
此时可以从喇叭中听到播放的音频,打开 VLC,输入开发板的地址,即可拉流查看,若出现人形则人形画框
- 通道 0 的 RTSP 地址
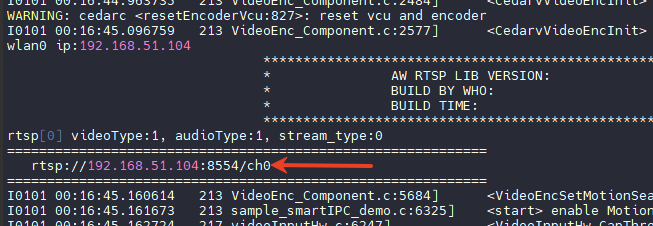
- 通道 1 的 RTSP 地址
使用 VLC 即可打开查看码流(摄像头画面颜色不同是镜头差异)
双目 2M 场景
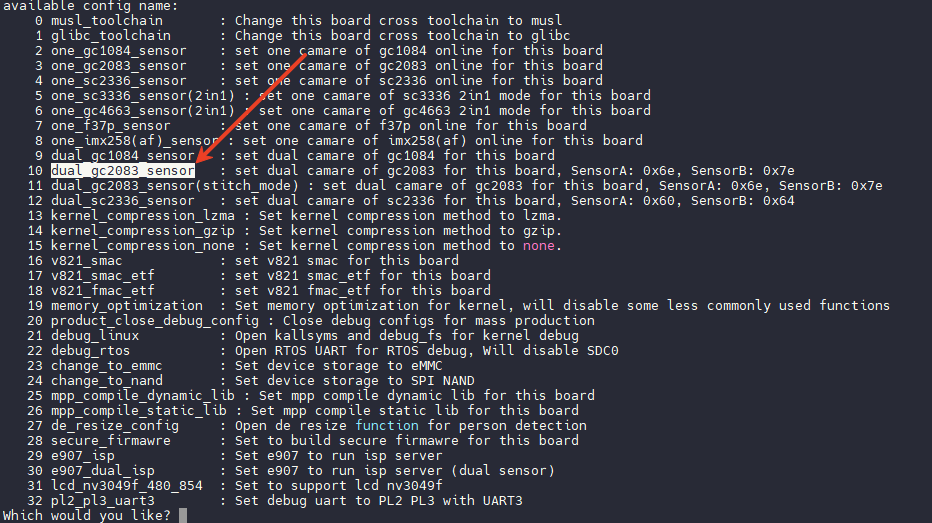
选择双目 GC2083 摄像头
运行 quick_config 选择双目 GC2083 摄像头配置,运行即可
修改配置参数
在默认的 sample_smartIPC_demo.conf 基础上,修改如下参数,也可以运行 sample_smartIPC_demo-dual-rtsp.conf 配置:
region_link_enable = 0
region_link_tex_detect_enable = 0
region_link_motion_detect_enable = 0

audio_test_enable = 1
motionAlarm_on = 1

main_rtsp_id = 0
main_isp_algo_freq = 5
main_src_width = 1920
main_src_height = 1080
main_src_frame_rate = 15
main_encode_width = 1920
main_encode_height = 1080
main_encode_frame_rate = 15
main_online_en = 1
main_online_share_buf_num = 1
main_2nd_enable = 1
main_2nd_src_width = 640
main_2nd_src_height = 480
main_2nd_src_frame_rate = 15
main_2nd_encode_width = 640
main_2nd_encode_height = 480
main_2nd_encode_frame_rate = 15
main_2nd_take_picture = 1
main_2nd_pdet_enable = 1

sub_enable = 1
sub_rtsp_id = 1
sub_isp_algo_freq = 5
sub_src_width = 1920
sub_src_height = 1080
sub_src_frame_rate = 15
sub_encode_width = 1920
sub_encode_height = 1080
sub_encode_frame_rate = 15
sub_online_en = 1
sub_online_share_buf_num = 1
sub_2nd_enable = 1
sub_2nd_src_width = 640
sub_2nd_src_height = 480
sub_2nd_src_frame_rate = 15
sub_2nd_encode_width = 640
sub_2nd_encode_height = 480
sub_2nd_encode_frame_rate = 15
sub_2nd_take_picture = 1
连接网络
使用命令扫描 WIFI 网络
wifi -s
找到需要连接的 WIFI 网络后,使用命令连接
wifi -c <SSID> <PASSWORD>
连接成功后会显示 wlan0: link becomes ready
运行 Sample
执行命令
/mnt/extsd/sample_smartIPC_demo -path /mnt/extsd/sample_smartIPC_demo.conf
双目 2M 合并一路场景(上下拼接)
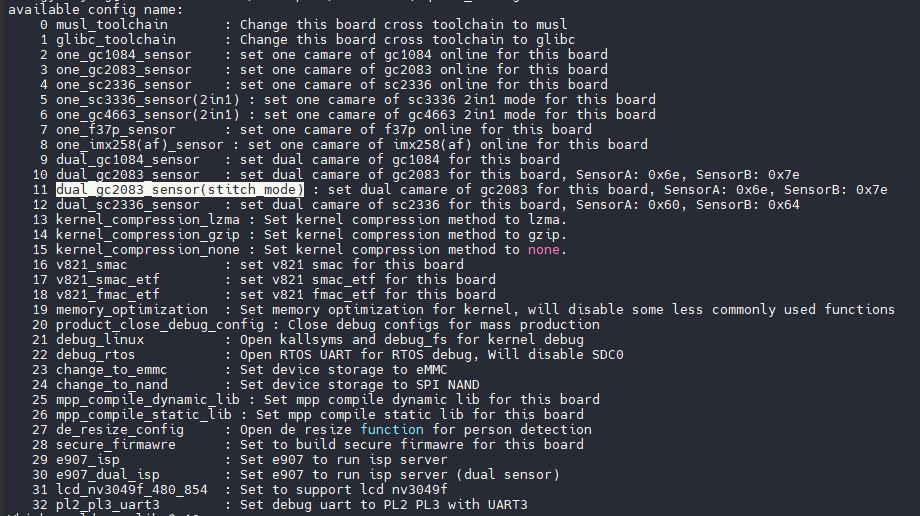
选择双目 GC2083 拼接摄像头
运行 quick_config 选择双目 GC2083 拼接摄像头配置,运行即可
修改配置参数
在默认的 sample_smartIPC_demo.conf 基础上,修改如下参数:
region_link_enable = 0
region_link_tex_detect_enable = 0
region_link_motion_detect_enable = 0

audio_test_enable = 1
motionAlarm_on = 1

main_rtsp_id = 0
main_isp_algo_freq = 5
main_src_width = 1920
main_src_height = 1080
main_src_frame_rate = 15
main_encode_width = 1920
main_encode_height = 1080
main_encode_frame_rate = 15
main_online_en = 1
main_online_share_buf_num = 1
main_2nd_enable = 1
main_2nd_src_width = 640
main_2nd_src_height = 480
main_2nd_src_frame_rate = 15
main_2nd_encode_width = 640
main_2nd_encode_height = 480
main_2nd_encode_frame_rate = 15
main_2nd_take_picture = 1
main_2nd_pdet_enable = 1

sub_enable = 1
sub_rtsp_id = 1
sub_isp_algo_freq = 5
sub_src_width = 1920
sub_src_height = 1080
sub_src_frame_rate = 15
sub_encode_width = 1920
sub_encode_height = 1080
sub_encode_frame_rate = 15
sub_online_en = 1
sub_online_share_buf_num = 1
sub_2nd_enable = 1
sub_2nd_src_width = 640
sub_2nd_src_height = 480
sub_2nd_src_frame_rate = 15
sub_2nd_encode_width = 640
sub_2nd_encode_height = 480
sub_2nd_encode_frame_rate = 15
sub_2nd_take_picture = 1
连接网络
使用命令扫描 WIFI 网络
wifi -s
找到需要连接的 WIFI 网络后,使用命令连接
wifi -c <SSID> <PASSWORD>
连接成功后会显示 wlan0: link becomes ready
运行 Sample
执行命令
/mnt/extsd/sample_smartIPC_demo -path /mnt/extsd/sample_smartIPC_demo.conf
此时可以从喇叭中听到播放的音频,打开 VLC,输入开发板的地址,即可拉流查看,若出现人形则人形画框